Knowledge Base
Using Kanban, Grouped, and Dense Views
Switching between table and kanban
Requirements, ITP, Programme, and BOM all offer a table view and a kanban view of the same underlying rows. Switching views never changes the data, only how it's arranged on screen. Use the view switcher in the top-right of the register to toggle between them.

The register toolbar: grouping picker, Spare/Dense density toggle, and the Table/Kanban switcher.
Kanban view is usually the faster way to see where work is stuck; table view is better for bulk edits and CSV export.
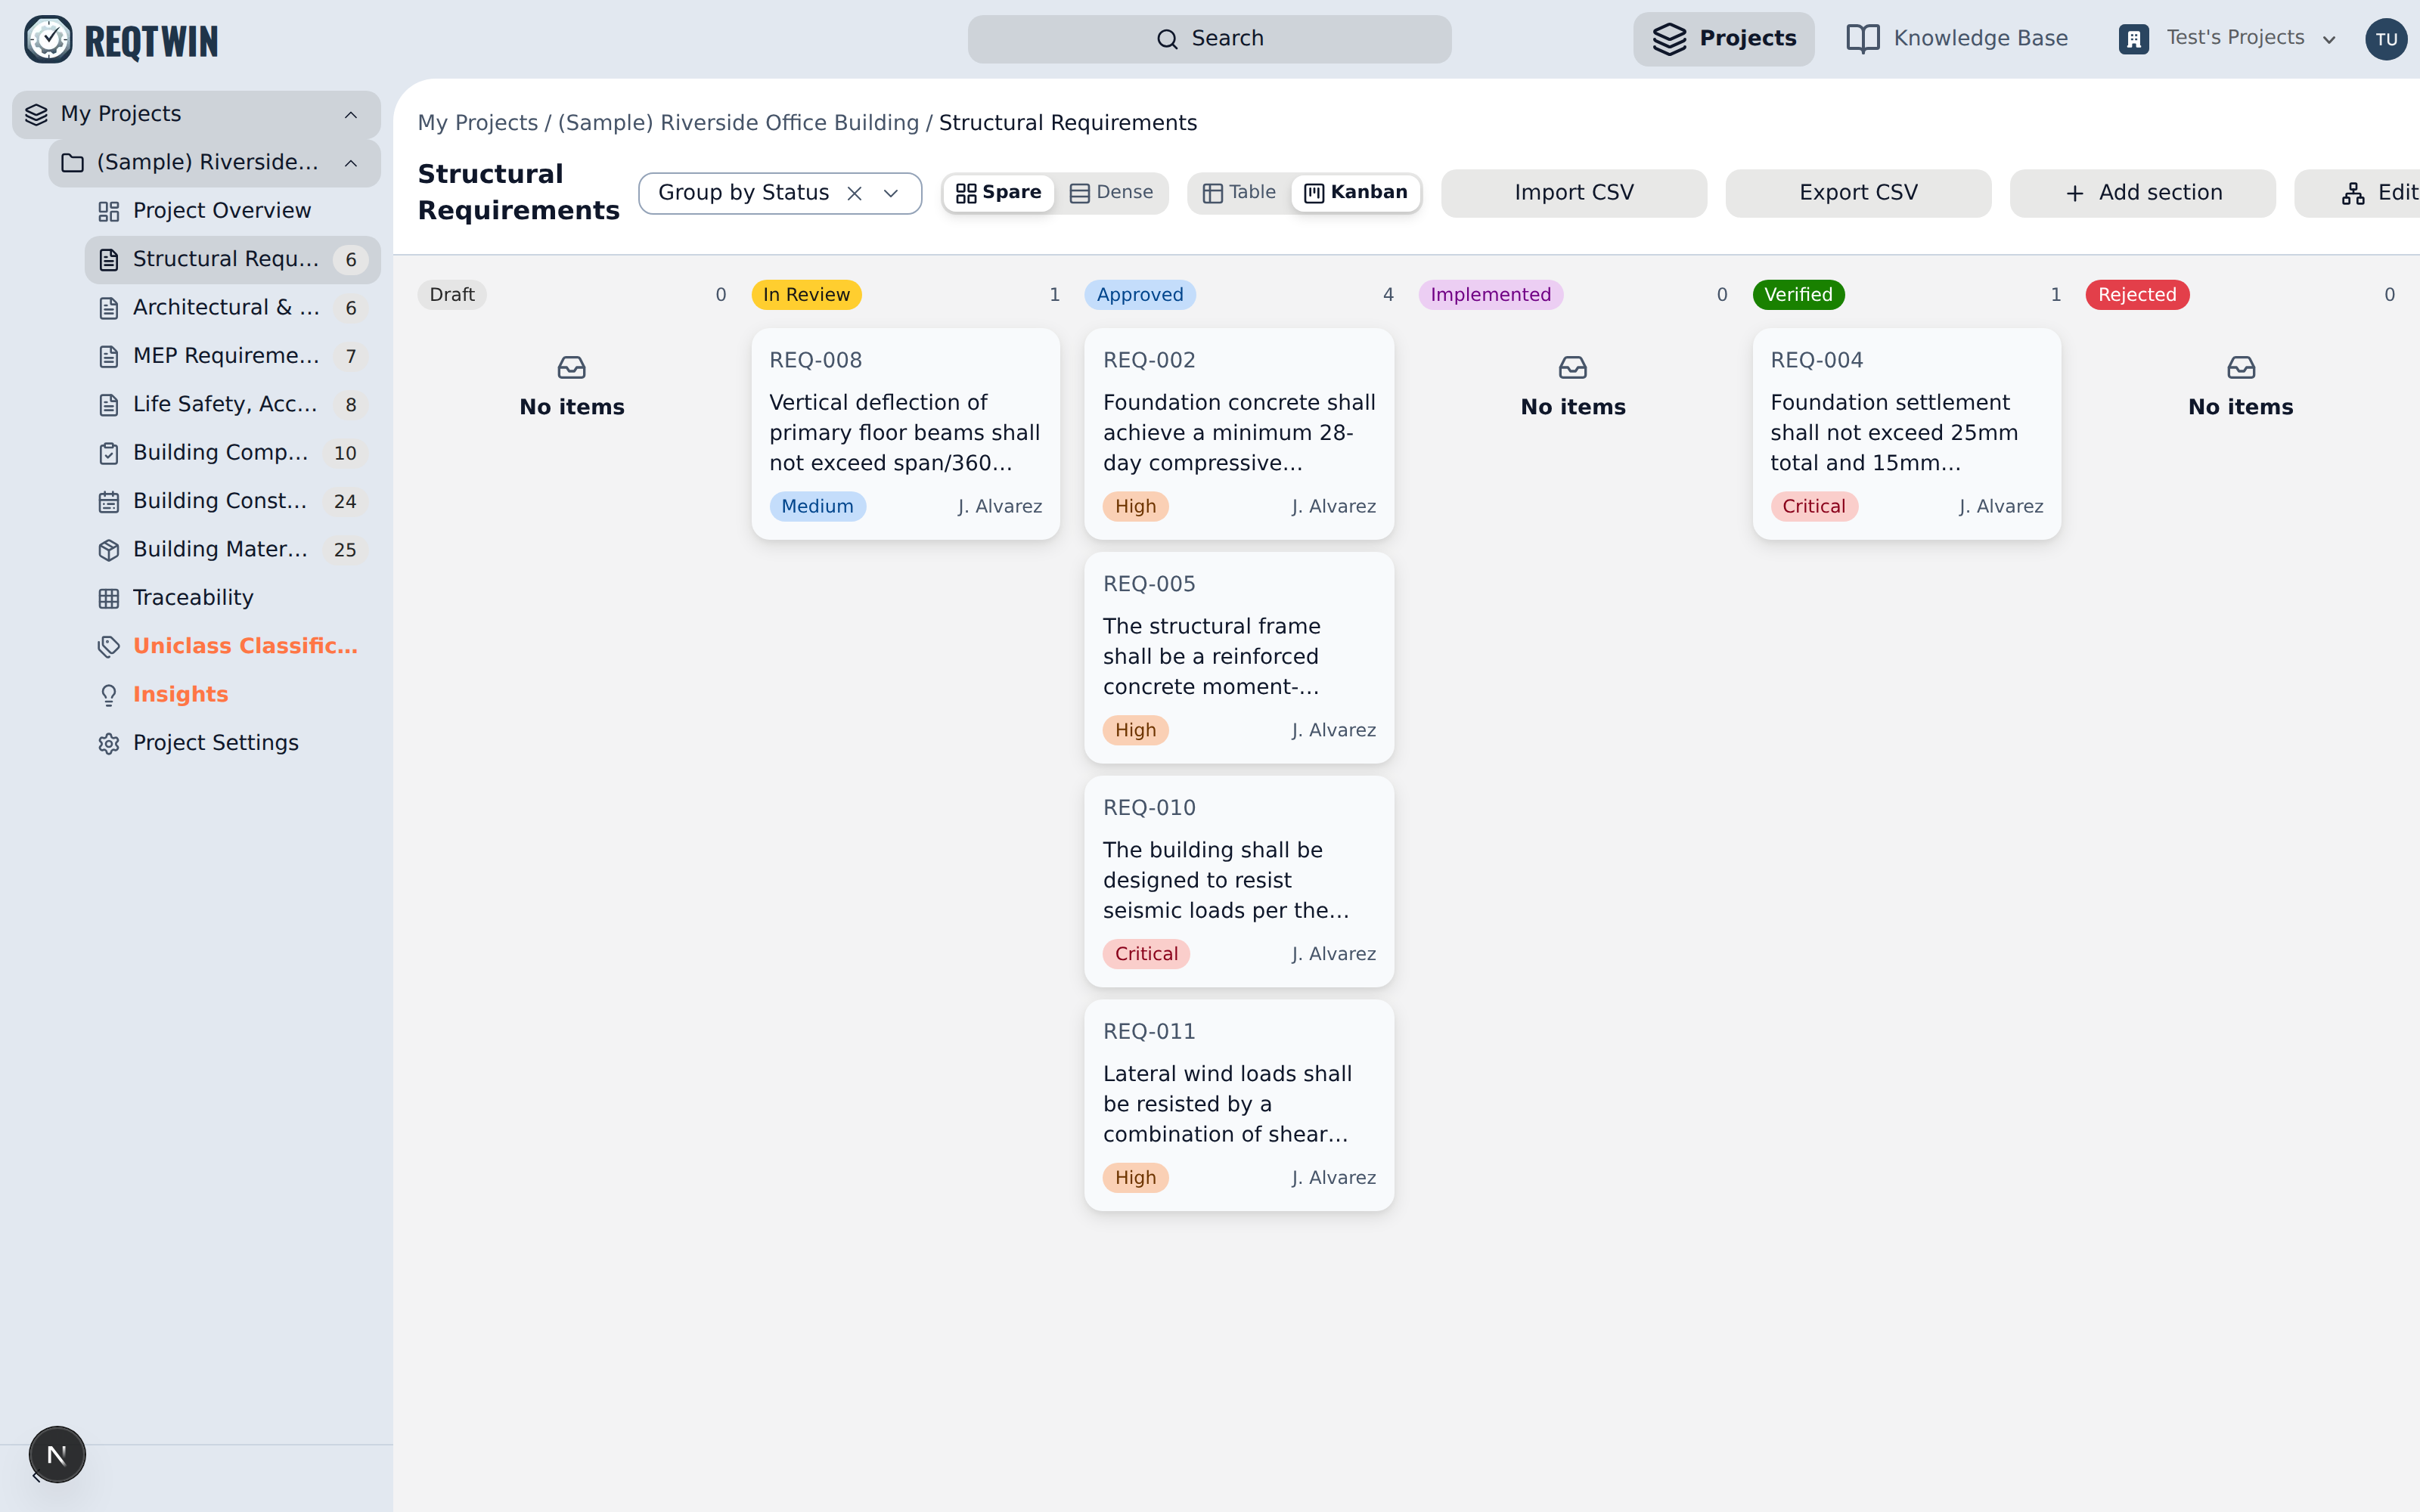
The same requirements register in kanban view, one column per status.
Field-based grouping
Kanban columns are driven by whichever field you group by (status, priority, or owner are the common choices, depending on the register). Dense rows (rather than cards) are used inside each column so you can still scan requirement or item numbers at a glance without opening every row.
Spare vs. dense rows
Independent of table or kanban mode, the Density toggle switches row height between Spare (more breathing room) and Dense (more rows on screen at once). It applies to both views.
What's remembered, and what isn't
Your table/kanban choice and row density are remembered per register type (Requirements, ITP, Programme, and BOM each keep their own, shared across every document and project of that type). The group-by field is remembered per document instead, via the URL, so it's shareable as a link and resets when you open a different document.